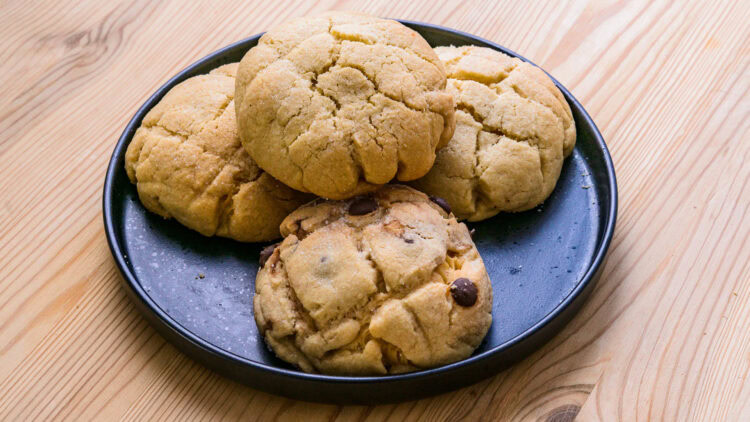
Japanese melon pan with a soft, fluffy center and a crisp exterior, wrapped in a thin layer of sweet cookie dough and beautifully scored in a classic grid pattern.
Bite in, and the sweet crust snaps like a cookie before giving way to a risen, airy, buttery crumb that pulls apart in tender strands. On top, the deep grid pattern and sparkling zarame crystals promise plenty of crunch.
Melon pan is an icon of kashipan, the family of sweet breads that developed in modern Japan during the Meiji era. In short, it’s the kind of pastry you buy still warm from the neighborhood bakery and eat on the way home. It belongs to the same wave of local adaptations of Western culinary techniques that shaped yoshoku, as seen in Japanese curry or omurice.
What is melon pan?
The name combines the English word “melon” with pan, a Japanese term derived from the Portuguese pão. Wheat bread arrived in Japan with the Portuguese in the 16th century, but Western baking techniques only became widespread from the Meiji era onward, when European cuisines were adapted to local tastes and helped shape yoshoku. Melon pan is part of that history of local adaptation: a foreign-inspired bread reimagined around texture.
Its structure is built from two doughs. At the center is a small enriched, yeasted dough made with bread flour, milk, egg, sugar, and butter. On the outside, a thin, shortbread-like cookie layer combines low-protein flour, butter, sugar, and egg, sometimes with a little baking powder. Before baking, the top is scored in a crosshatch pattern; in the oven, the dough rises while the crust tightens and then cracks along those cuts.
The traditional flavor profile is deliberately simple: butter, vanilla, caramelized sugar, and subtle notes of fermentation. It contains no melon juice, purée, or melon flavoring. The bun is usually round, topped with a layer of cookie dough that covers the top and comes partway down the sides, while the base is often left exposed so the dough can expand. It can then be coated with zarame for extra crunch. The ideal melon pan has a soft, slightly elastic crumb beneath a firm, dry, crumbly shell, firmer than that of Hong Kong bolo bao. If the crust is soft, something has gone wrong.
From Armenia to Kansai: the origins of melon pan
The story of melon pan is usually told through two main theories. In Tokyo, the more romantic version leads to Hovhannes, or Ivan, Sagoyan, an Armenian master baker trained in French and Viennese techniques.
After time spent in Moscow and then Harbin during the Russian Revolution, he is said to have settled in Meguro. He was then reportedly recruited by the Imperial Hotel through the industrialist Okura Kihachiro. Sagoyan is believed to have worked there before opening his own bakery, Monsieur Ivan.
There, he is thought to have helped popularize a sweet bread that combined a soft yeasted dough with a crisp cookie crust, known as melon pan or Sunrise. His influence was not limited to this one product. His students contributed to the rise of Japanese milk bread, or shokupan, which became essential in dishes such as katsu sando and tamago sando.

In Kansai, the story is told differently. In Kobe, the Kinseido bakery is said to have sold a cookie-crusted bread called sanuraisu, or Sunrise, before the war. Its radiating pattern is thought to have been inspired by the flag of the Imperial Japanese Navy, a naval symbol closely associated with the military port and shipyards of Kure.
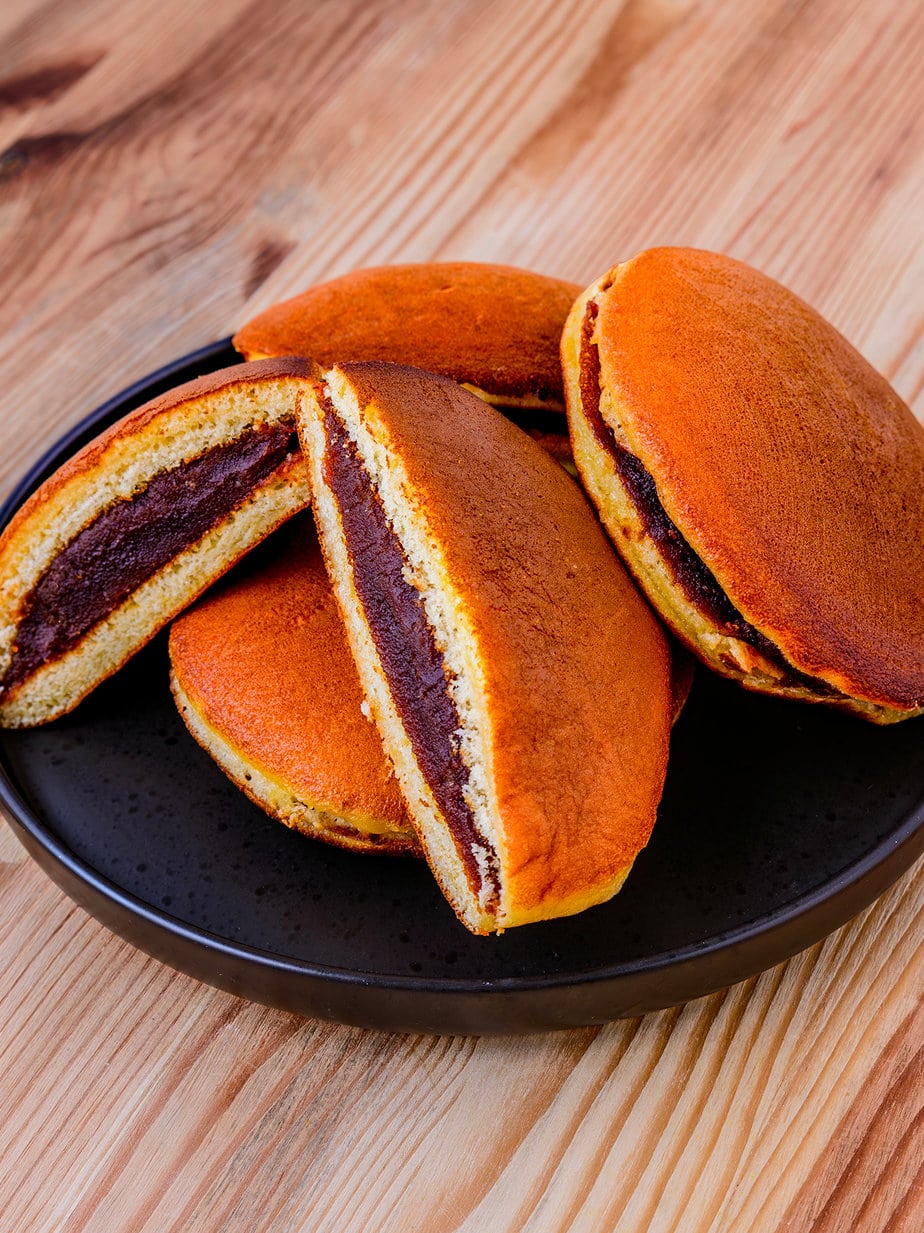
Local “melon pan” could also refer to a tapered, rugby-ball-shaped bread whose name was linked to the meron-gata, an old rice mold used in yoshoku restaurants. In Kobe in particular, the name could describe a regional version that was often smooth, without a cookie crust, and filled with shiro-an, a sweet white bean paste.
In the naval city of Kure, the Melonpan bakery, founded in 1936, developed another local version: a bread molded in a meron-gata and filled with pastry cream. The radiating pattern, then, is mainly associated with Sunrise, while the Kure version stands out more for its molded shape and filling.
The archives make the origin more complex: a utility model was registered in 1931, but similar breads may already have been circulating by the middle of the Taishō era. Science journalist Kazuko Tojima, in The Truth About Melon Pan, also discusses theories connecting some similar breads to Latin American influences, especially Mexican ones, because of their resemblance to concha.
She explicitly dismisses the theory involving German prisoners, citing a lack of solid archival evidence. Over time, the Tokyo version—round, crosshatched, and topped with cookie dough—became the national reference. Kansai, meanwhile, has preserved its own names, shapes, and fillings. This coexistence can still create confusion from one region to another.
The main ingredients in melon pan
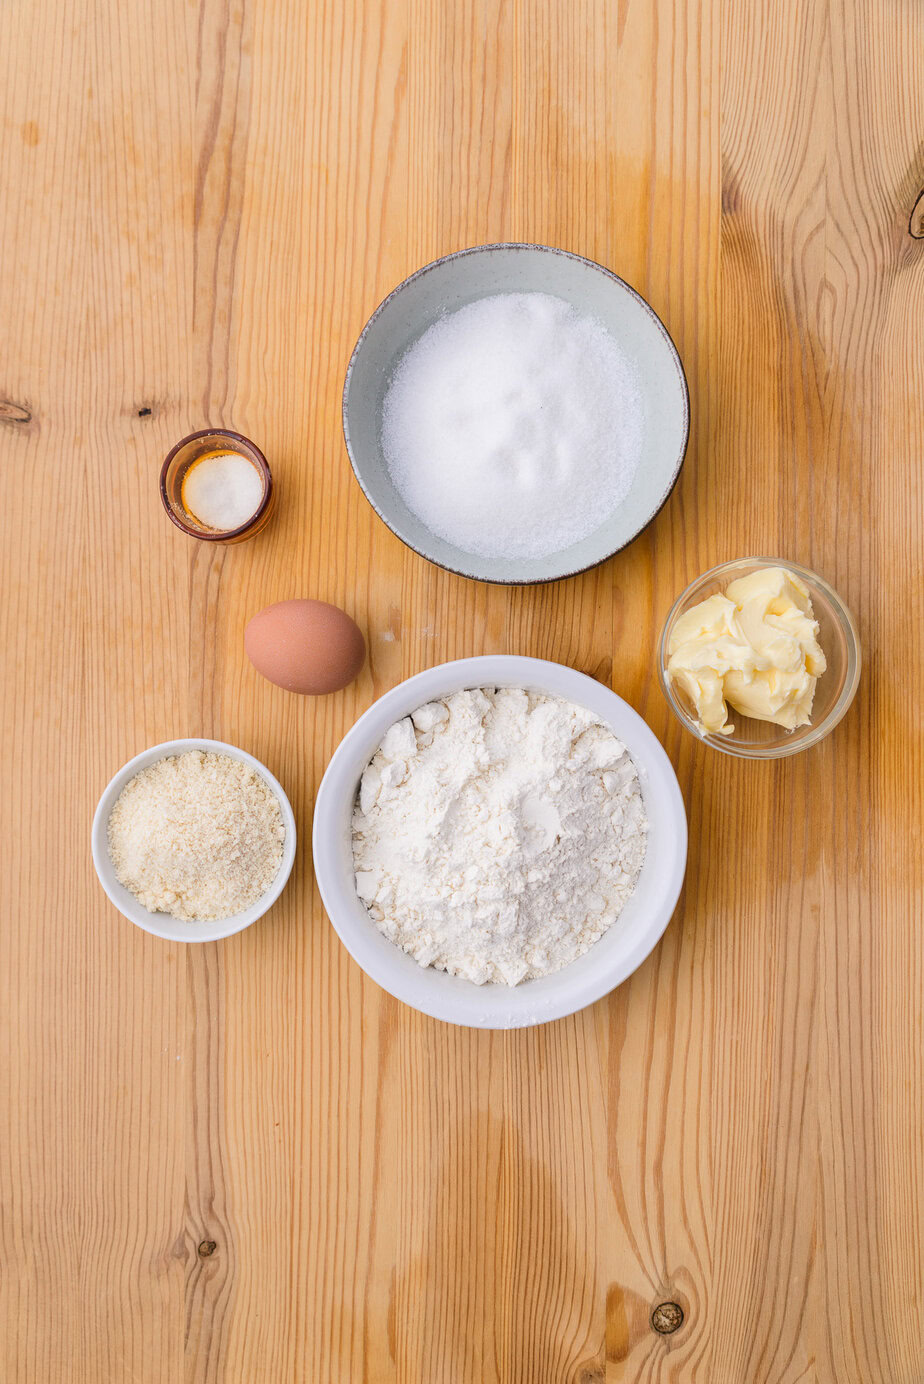
- Bread flour: rich in protein, it forms the gluten network that traps gas and gives the crumb its elasticity. Some bakers add a little low-protein flour for a softer texture. It is the same type of flour that gives structure to katsu sando and tamago sando.
- Unsalted butter: added after kneading has begun, it softens the crumb without weakening the gluten too much. In the crust, it creates that shortbread-like crunch and buttery aroma as it bakes. Margarine works too, but you can taste the difference.
- Whole milk and egg: milk hydrates the dough, adds lactose, and brings a rounded dairy flavor; egg binds, colors, and adds softness. Together, they keep the crumb tender without making it heavy.
- Dry yeast: it provides volume and those subtle aromas of warm bread. Sugar feeds the yeast during fermentation. This is completely different from baking powder, which is used only in the cookie crust to lighten it.
- Low-protein flour (cookie crust): low in protein means low in gluten, so the texture stays short, crumbly, and never rubbery. This is what gives melon pan its signature crunch.
- Vanilla: it defines the classic flavor profile. Lemon zest appears in some versions, but less often. Melon, however, is absent from the historical version: green or fruit-flavored buns are modern variations.
- Zarame: these large sugar crystals scattered over the dome add sparkle and extra crunch. You’ll find that same caramelized sugar note in other Japanese sweets, such as mitarashi dango.
Signs of authenticity and pitfalls to avoid
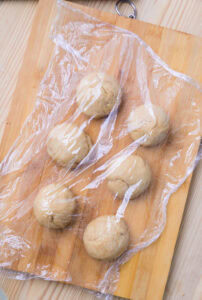
Crispness is essential. A soft or sticky crust often means the bread has been wrapped in plastic for too long. Moisture from the crumb migrates into the cookie layer, gets trapped in the packaging, and softens what should snap. Melon pan keeps its texture best when it cools uncovered on a rack and is eaten soon afterward.
In the round version that has become the national standard, “melon” mainly refers to its appearance: a deep grid pattern, a domed shape, and a cracked surface. In some regional traditions, the name can also refer to the meron-gata mold used to shape the bread, or, according to the Co-op Kobe archives, to a tapered shape meant to evoke makuwauri, an oriental melon.
Green versions, fruit-flavored buns, and melon pan filled with cream, chocolate, or ice cream all show how lively this bread remains today. That evolution echoes other Japanese sweets such as dorayaki and mochi.
Some modern fillings, such as black sesame paste or taro paste, do move away from the historical model. The most reliable signs remain the same: a light crumb, a dry and crumbly cookie crust, and a clean crunch from the very first bite.

Ingredients
Pâte à biscuit (pour 2 préparations)
- 90 g de beurre non salé ramolli
- 100 g de sucre cristallisé fin
- 1 œuf entier à température ambiante (55 à 60 g)
- 220 g de farine faible T45
- 40 g de poudre d’amandes sans peau
- 2 pincées de sel fin de Guérande
Pâte à pain (pâte fermentée)
- 140 g de farine forte 10–11% de protéines
- 15 g de sucre de canne
- 95 g de lait entier
- 1.5 g de levure sèche instantanée pas de levure chimique
Pâte à pain (pétrissage final)
- 20 g de farine forte
- 40 g de farine faible T55, moins de 10% de protéines
- 10 g de sucre de canne
- 10 g de babeurre en poudre
- 3.5 g de sel
- 1 jaune d’œuf
- 20 g de lait
- 20 g de beurre non salé ramolli
Garniture
- 30 g de sucre en poudre
Variante
- 5 g de pépites de chocolat optionnel
Instructions
Pâte à biscuit
- Weigh the butter and let it soften; bring the egg to room temperature. Sift together the cake flour, almond flour, and salt.90 g de beurre non salé, 1 œuf entier, 220 g de farine faible, 40 g de poudre d’amandes, 2 pincées de sel fin de Guérande
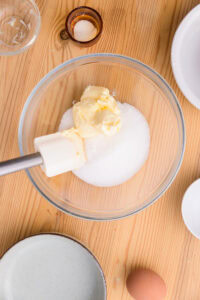
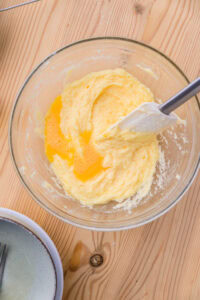
- Add the sugar to the butter and mix with a spatula until smooth and pliable. Beat the egg, then add it to the butter in 4 to 5 additions, emulsifying well after each addition.100 g de sucre cristallisé fin
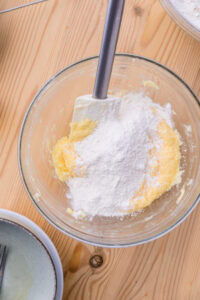
- Add the sifted dry ingredients and mix with a spatula. Once partly incorporated, mix by hand until no streaks of flour remain, then knead briefly about 10 times.
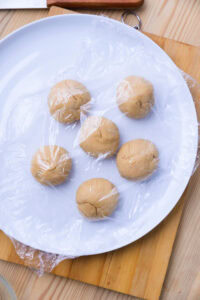
- Divide the cookie dough into 2 portions, wrap, and flatten. Refrigerate the portion you will use right away and freeze the other; let rest for at least 1 hour (ideally 6 to 8 hours). If needed, thaw in the refrigerator 1 to 2 hours before using.
Pâte fermentée
- Chauffer le lait à environ 30 °C, y saupoudrer la levure et laisser reposer un moment. Mélanger la farine forte et le sucre, puis dissoudre la levure gonflée dans le lait et mélanger liquides et poudres jusqu’à homogénéité.140 g de farine forte, 15 g de sucre de canne, 95 g de lait entier, 1.5 g de levure sèche instantanée
- Pétrir légèrement environ 1 minute pour faire disparaître les zones farineuses, former une boule, puis faire fermenter à 30 °C environ 1 heure, jusqu’à ~1,8 fois le volume initial.
Pétrissage final
- Peser les ingrédients du pétrissage final et laisser le beurre ramollir. Déchirer la pâte fermentée en ~10 morceaux.20 g de farine forte, 40 g de farine faible, 10 g de sucre de canne, 10 g de babeurre en poudre, 3.5 g de sel, 1 jaune d’œuf, 20 g de lait, 20 g de beurre non salé
- Mélanger les farines, le sucre, le sel et le babeurre en poudre. Mélanger le jaune d’œuf et le lait, puis ajouter aux poudres et mélanger partiellement. Ajouter les morceaux de pâte fermentée et pétrir; quand la pâte est incorporée à ~80 %, ajouter le beurre et pétrir jusqu’à obtenir une pâte lisse.
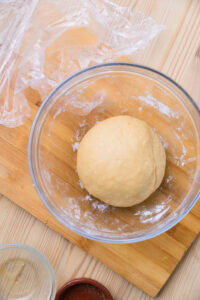
- Première fermentation: former une boule, mettre en bol et couvrir. Fermenter à 30 °C environ 1 heure, jusqu’à doublement (test du doigt).
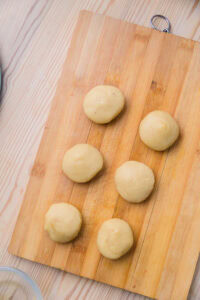
- Diviser la pâte en 6 portions, former des boules, couvrir et laisser reposer 15 minutes.
Préparation de la pâte à biscuit (portionnage)
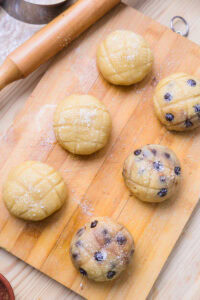
- Pendant la première fermentation, diviser la pâte à biscuit en 6 portions; pétrir chaque portion 4 à 5 fois et former des boules. Garder bien froid au réfrigérateur si préparé à l’avance. Pour la version chocolat, incorporer les pépites de chocolat à la pâte à biscuit.5 g de pépites de chocolat
Façonnage et finition
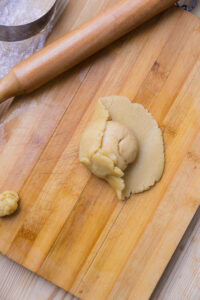
- Aplatir chaque portion de pâte à biscuit en disque légèrement plus grand que la boule de pâte à pain. Rebouler la pâte à pain puis l’envelopper avec la pâte à biscuit; retourner côté biscuit vers le haut et arrondir.
- Parsemer uniformément le sucre de garniture sur la surface biscuitée et tracer un quadrillage léger sans entailler trop profondément.30 g de sucre en poudre
Deuxième fermentation et cuisson
- Faire fermenter à 30 °C pendant 45 minutes (sans vapeur). Préchauffer le four à 200 °C pour qu’il soit prêt à la fin de la fermentation.
- Baisser le four à 190 °C et cuire 13 à 15 minutes, jusqu’à légère coloration. Laisser refroidir sur grille.
Notes
- For the best contrast with the exceptionally soft, airy crumb, make the melon pan fairly large.
- The cookie dough quantity is enough for 2 batches, so you do not have to use a partial egg; for a single batch, halve all the cookie dough ingredients.
- For the topping, regular granulated sugar works better than very fine sugar.
- If the cookie dough rests only briefly, the surface will be crispier and more likely to crack during baking.