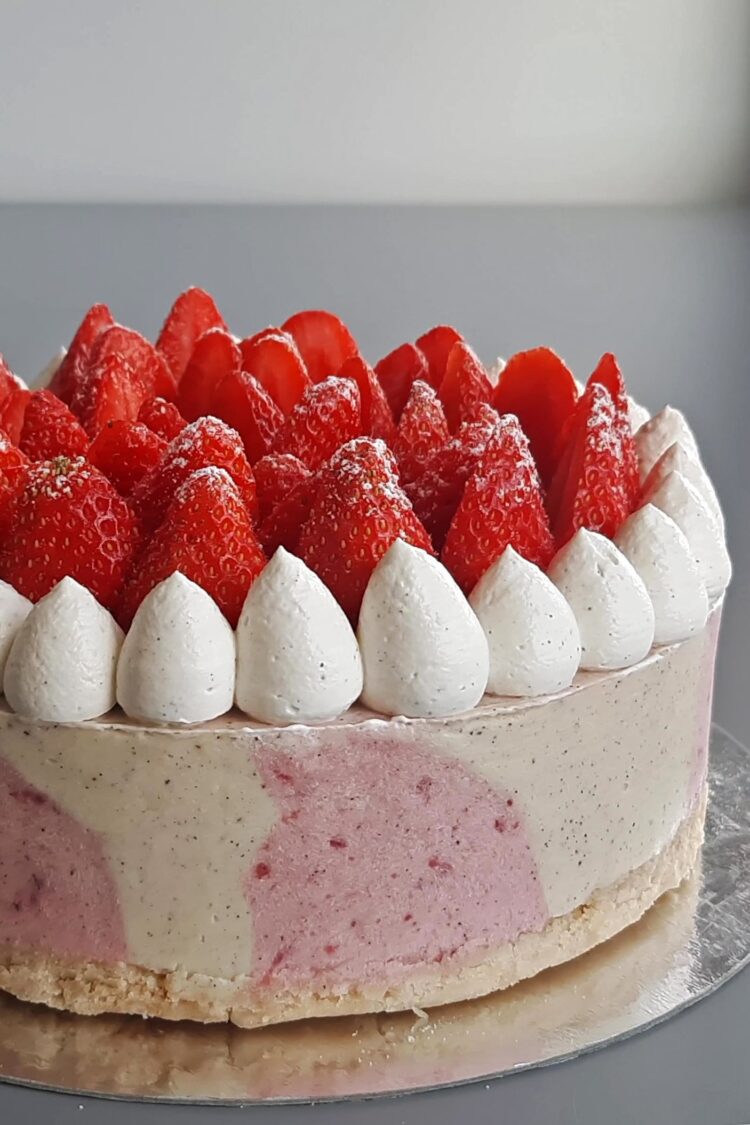
Looking for a strawberry cake that tastes light and fresh, not heavy from the very first bite? The strawberries keep their bright acidity, the cream is lighter than buttercream, and the finished cake truly has the structure of a classic fraisier.
The assembly is methodical, but there’s nothing tricky about it if you follow each step in order. This recipe is meant to be made by weight, down to the gram, so weigh everything instead of measuring by volume. You can also browse the site’s other gluten-free cakes and entremets.
What is a vegan gluten-free fraisier?
It’s a strawberry entremets made with vanilla sponge, syrup, vanilla mousseline cream, and a second mousseline flavored with strawberry. This version is gluten-free, egg-free, and dairy-free, yet it still keeps the signature structure of a fraisier, with clean layers and neat slices.
The biggest difference is the cream. Instead of buttercream, chef Rommel Reyes uses mousseline: a vanilla pastry cream whipped with softened vegan butter. The goal is simple: create a cake that feels lighter and less sweet, while still being stable enough to hold the strawberries without feeling heavy on the palate.
The cream stays delicately in the background, while the strawberries’ natural tartness brings balance. The vanilla sponge acts as a subtle base that lets the fruit shine.
Main ingredients
Barista-style oat milk is used throughout the recipe, both for the sponge and the creams. It keeps the cake soy-free and performs well in baking. For the faux buttermilk, mix it with vinegar and let it sit for a few minutes, until it visibly thickens or lightly curdles before adding it to the batter.
The vegan butter matters just as much as the milk. Use a block-style vegan butter, such as Naturli, and avoid substituting margarine. In the cream, one portion is added cold to the hot pastry cream, then another portion, softened this time, is incorporated later to whip the mousseline.
For the flour, an all-purpose gluten-free blend made for cakes works best in the sponge. A simple homemade gluten-free blend will also work. Almond flour rounds out the batter and adds a little tenderness and flavor.
Vanilla gives the cream its backbone. If you have one, a real vanilla bean gives the cleanest aroma, but vanilla extract, vanilla powder, or a scraped vanilla pod will also work. For the fruit component, both the compote and the finishing garnish can be made with ripe strawberries, and frozen strawberries work well for the compote too.
Fresh strawberries make a big difference in the final result. Choose fruit that is fresh, ripe, and juicy, both for flavor and appearance. Finally, the cream is divided in two: one half stays vanilla, while the other is mixed with strawberry jam to make the second mousseline.
Technical tips and pitfalls to avoid
Assembly goes smoothly if you work in stages: jam, sponge, pastry cream, mousseline, syrup, whipped cream, then final assembly. Quantities are given by weight, in metric, and that really matters here if you want the intended textures. A fraisier like this is far less forgiving than a simple everyday cake.
Strawberry jam
If the strawberries are large, cut them before cooking so they break down more evenly. Start over low heat, stirring constantly, just long enough to dissolve the sugar completely. Only then raise the heat to high and boil for 3 to 5 minutes.
After that, reduce the heat to medium and let the jam simmer, stirring from time to time, until it thickens. There is no fixed extra cooking time here; stop when the texture is right. Pour it into a container, let it cool to room temperature, then refrigerate.
The sponge
Make the faux buttermilk by mixing the oat milk with the vinegar. Let it rest for a few minutes, until it thickens or curdles slightly; that’s exactly what you want before using it. Meanwhile, whisk all the dry ingredients together in a large bowl.
Add the faux buttermilk and melted vegan butter, then whisk or mix with an electric mixer until the batter is smooth. Preheat the oven to 170°C and line the baking tray with parchment paper before pouring in the batter. Bake for 20 to 25 minutes.
Let the sponge cool before cutting it, otherwise it will tear more easily. If you are not using it straight away, store it in the refrigerator.
Pastry cream and mousseline
To make the pastry cream, first whisk together the oat milk, sugar, vanilla, and cornstarch until the cornstarch is fully dissolved. Cook over medium heat, whisking constantly, until the cream thickens, then remove it from the heat. Add the cold butter.
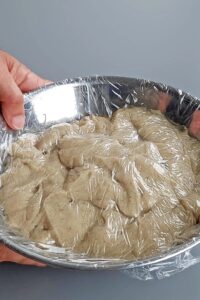
Pass the cream through a sieve to remove any lumps. This is also the easiest fix if the texture is not perfectly smooth. Cover directly with plastic wrap and keep it at room temperature.
Before whipping the mousseline, make sure the pastry cream has fully returned to room temperature. Then add the softened vegan butter, one piece at a time, using a hand mixer or stand mixer. Stop once the texture is light and smooth; that’s your visual cue.
Divide the mousseline into two equal portions. Leave one half plain vanilla, and mix the strawberry jam into the other until smooth. Keep the strawberry mousseline in a cool place, but not in the refrigerator.
Syrup, whipped cream, and assembly
Make the syrup by simply bringing the water and sugar to a boil, then set it aside off the heat. Whip the cream with the vanilla until firm. If you are not using it straight away, keep it in the refrigerator.
Cut two sponge discs: one exactly the size of the ring, 23 cm, and a second slightly smaller so it fits neatly inside. Use a 23 cm ring that is 4 cm high, lined with a strip of acetate. Place the first disc in the bottom and brush it generously with syrup.
Next, pipe alternating lines of vanilla mousseline and strawberry mousseline all around the inside of the ring. Press the piped cream against the edge, then bring it upward to cover the entire side. Inside, spread a layer of mousseline over the sponge, then add about 150 g of strawberry jam and smooth it with an offset spatula.
Place the second disc in the center, brush it with syrup as well, then cover the top with mousseline, filling all the way to the edge. Level off any excess, then place the cake in the freezer for at least 1 hour before unmolding. Remove the ring and the strip of acetate.
To finish, pipe vanilla whipped cream around the top edge of the cake. Halve the fresh strawberries and arrange them in a circle against the whipped cream. Dust lightly with powdered sugar, and the cake is ready.
Storage
Let the strawberry jam cool to room temperature, then store it in the refrigerator. The sponge can also be kept chilled if it is ready before the other components.
The pastry cream should stay at room temperature, covered directly with plastic wrap, until you turn it into mousseline. Keep the strawberry mousseline in a cool place, but not in the refrigerator. Refrigerate the whipped cream until it is time to finish the cake.
Once assembled, freeze the cake for at least 1 hour to firm it up before unmolding.
You’ll also find this recipe in my vegan desserts.
Recipe developed by chef Rommel Reyes. Discover his work on Instagram, his Substack newsletter, and his YouTube channel.
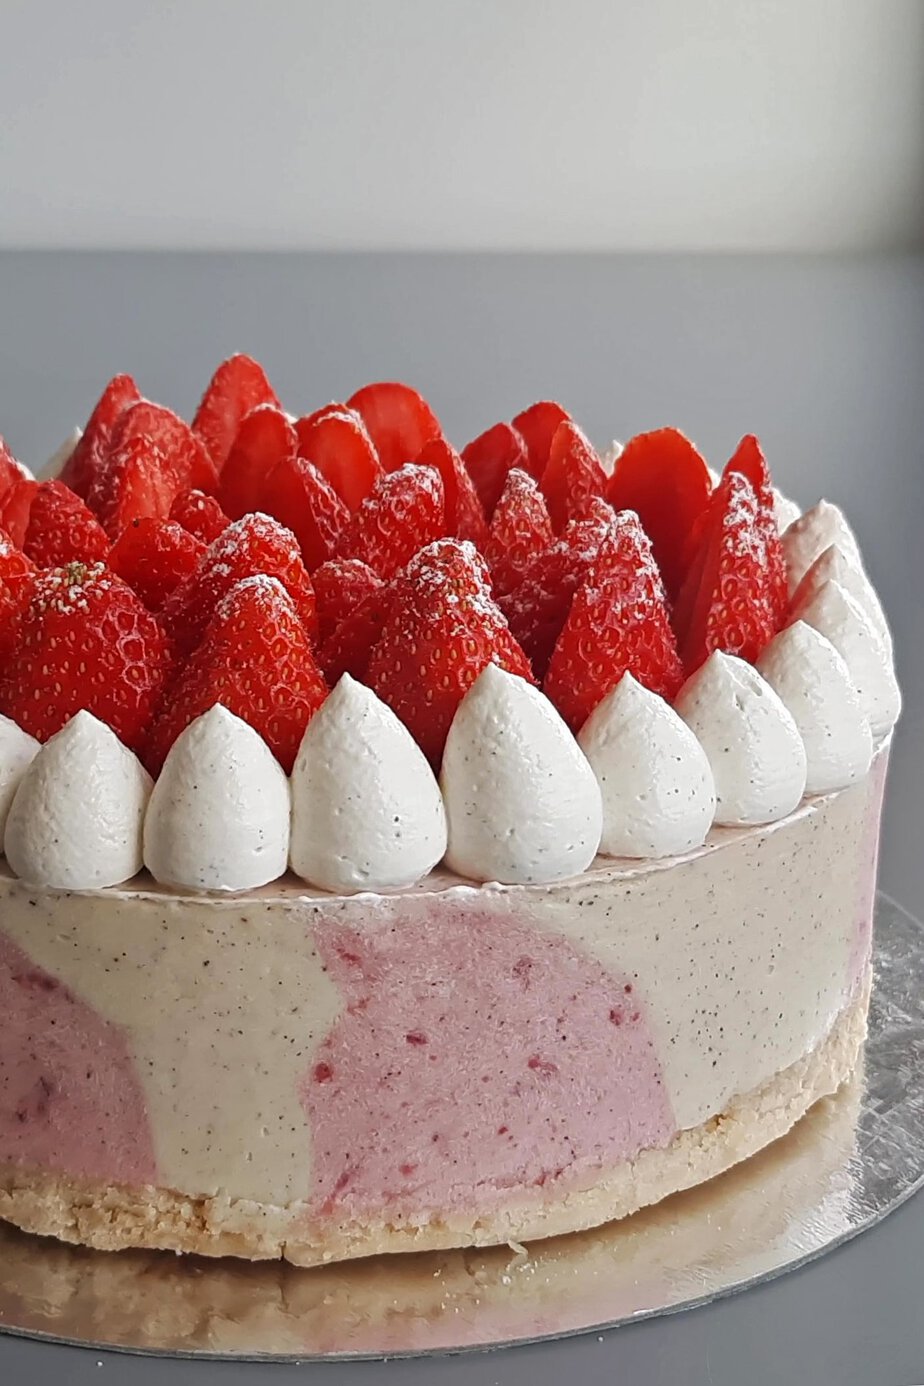
Gluten-Free Strawberry Cake
Ingredients
- 500 g strawberries fresh or frozen
- 110 g jam sugar
- juice of 1 medium lemon
- 800 g barista-style oat milk gluten-free
- 30 g vinegar
- 140 g vegan butter melted
- 1 pinch salt
- 500 g pastry flour gluten-free
- 100 g almond flour
- 16 g baking powder
- 8 g baking soda
- 300 g granulated sugar
- 1 liter barista-style oat milk gluten-free
- 240 g granulated sugar
- 120 g cornstarch
- 4 g agar-agar powder
- 15 g vanilla extract or 1 g vanilla powder (or 1 whole vanilla bean, scraped)
- 60 g vegan butter gluten-free, soy-free
- 200 g vegan butter softened, gluten-free, soy-free
- 1 full batch of vanilla pastry cream
- 1/2 batch of vanilla mousseline
- 120 g strawberry jam gluten-free, vegan
- 200 g plant-based whipping cream gluten-free, soy-free
- 1/4 tsp vanilla powder
- 500 g strawberries fresh, medium-sized
- 100 ml water
- 50 g granulated sugar
Instructions
Strawberry Jam
- If the strawberries are large, cut them into smaller pieces, then combine all the ingredients in a saucepan.500 g strawberries, 110 g jam sugar, juice of 1 medium lemon
- Cook over low heat, stirring constantly, until the sugar has fully dissolved.
- Increase the heat to high and boil the jam for 3 to 5 minutes.
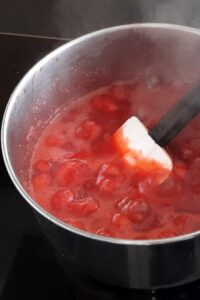
- Reduce to medium heat and simmer, stirring occasionally, until the jam has thickened.
- Transfer to a container.
- Let cool to room temperature, then refrigerate.
Genoise Sponge Cake
- Make the vegan buttermilk by mixing the oat milk and vinegar.800 g barista-style oat milk, 30 g vinegar
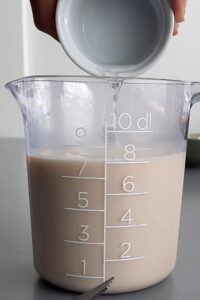
- Let it sit for a few minutes to curdle and thicken.
- Whisk together all the dry ingredients in a large mixing bowl.1 pinch salt, 500 g pastry flour, 100 g almond flour, 16 g baking powder, 8 g baking soda, 300 g granulated sugar
- Add the vegan buttermilk and melted vegan butter to the dry ingredients, and whisk or beat with an electric mixer until smooth.140 g vegan butter
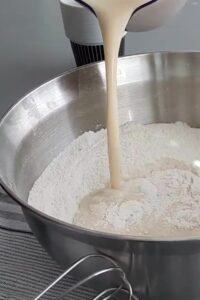
- Preheat the oven to 170°C.
- Line a baking tray with parchment paper, then pour in the batter.
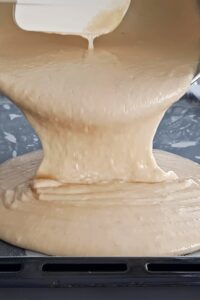
- Bake for 20-25 minutes.
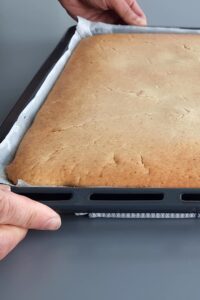
- Let the sponge cool completely before cutting.
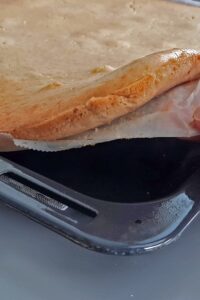
- Refrigerate if you don’t need it right away.
Vanilla Pastry Cream
- In a saucepan, combine the oat milk, sugar, vanilla powder, and cornstarch, then whisk well until the cornstarch has fully dissolved.1 liter barista-style oat milk, 240 g granulated sugar, 15 g vanilla extract, 120 g cornstarch
- Cook over medium heat, whisking constantly, until thickened.
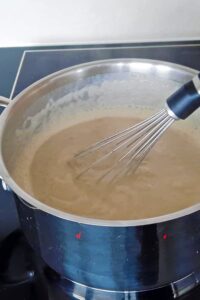
- Remove from the heat.
- Add the cold butter, then strain to remove any lumps.60 g vegan butter
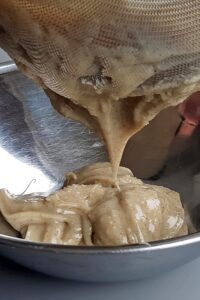
- Cover directly with plastic wrap and keep at room temperature.
Vanilla and Strawberry Mousseline
- Make sure the pastry cream has cooled completely to room temperature.1 full batch of vanilla pastry cream
- Add the softened vegan butter to the vanilla pastry cream.200 g vegan butter
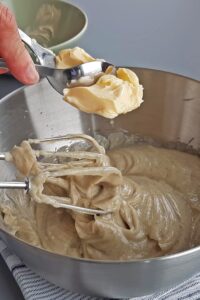
- Beat it in a little at a time with a hand mixer or stand mixer until the mixture is light and smooth.
- Divide the mousseline evenly between two bowls.
- Add the strawberry jam to one half, then mix until smooth.120 g strawberry jam
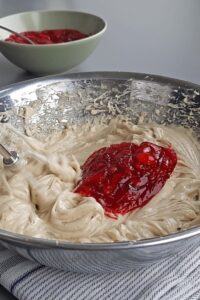
- Cover and keep in a cool place, but not in the refrigerator.
Sugar Syrup
- Bring the water and sugar to a boil in a saucepan.100 ml water, 50 g granulated sugar
- Remove from the heat and set aside.
Vanilla Whipped Cream
- Combine the cream and vanilla in a bowl, then whip to stiff peaks.200 g plant-based whipping cream, 1/4 tsp vanilla powder
- Refrigerate if you don’t need it right away.
Cake Assembly
- Cut out two round sponge layers.
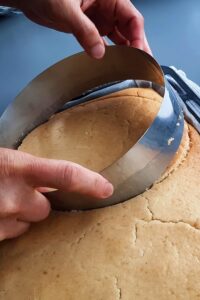
- Cut one to match the size of the cake ring (23 cm); the other should be slightly smaller so it fits inside the cake.
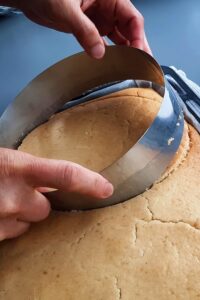
- Prepare a 23 cm cake ring, 4 cm (1.5 in) deep, lined with an acetate strip.
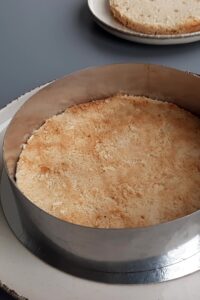
- Place the first sponge layer in the bottom, brush it with sugar syrup, then pipe the vanilla and strawberry mousselines alternately around the sides.1/2 batch of vanilla mousseline

- Press the piped mousseline against the ring, then smooth it upward to cover the entire ring.
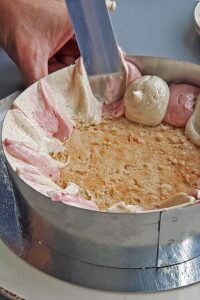
- Spread a layer of mousseline over the sponge.
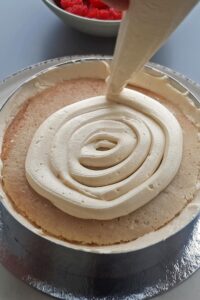
- Top with about 150 grams of strawberry jam.
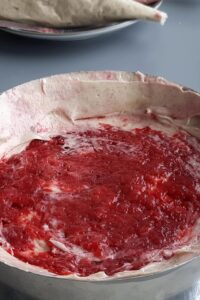
- Spread evenly with an offset spatula or the back of a spoon.
- Place the second sponge layer in the center, brush it with sugar syrup, then spread mousseline over the top to fill the mold.
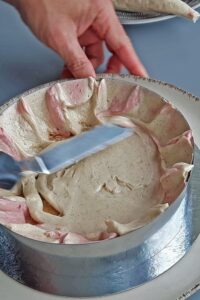
- Remove any excess cream, then freeze for at least 1 hour.500 g strawberries